RabbitEars Autologger: How To Set Up on SDR Console
(Some of the following content is adapted from a post by Les Reybyrn N1LF)
Introduction
Logger Map Page: https://rabbitears.info/tvdx/fm_all_tuners
Click on individual monitoring stations near you to show even more detail. Want to join in on the fun? TRUST ME, YOU DO! That’s pretty easy too.
This network represents a real-time, 24/7 propagation monitoring system capable of detecting tropo and e-skip openings nationwide. But for it to impact FM DXers, we need more stations, especially in Florida, Texas, Arizona, California, Montana, etc. Let’s fill that map up!
What You Need
- Computer running the Windows OS (works on Macs running Windows via BootCamp)
- A Software Defined Radio (SDR)
- An antenna for FM/VHF
- Either SDR Console or SDR# - both free
- An individual monitoring ID (see Step #1 for details)
Total investment could easily be under $50 bucks. Many FM DXers are already using SDRs and the software required.
Attention: Mac Users
If your Mac has an Intel-based processor, you may be able to install Windows using Boot Camp Assistant. All you need is a valid Windows ISO image and an empty USB drive.
Follow the instructions on the Apple website.
If installed properly, your Mac should be able to run Windows software as if it was a Windows PC. Your Mac OS data/software will NOT be removed.
SDR Console
If you haven't already, navigate here and follow the instructions for downloading & installing SDR Console. Within SDR Console, please enable the RDS Database, as this will be necessary to get RDS logs to the autologger.
Getting Started
Send an email to Russ Dwarshuis - k8bu_vhf@hotmail.com
In the email, you should include the following:
- A short description about your receiver / The city and state should included in this description
- Latitude/Longitude Coordinates
Within a few days, you should receive a response from him containing the necessary installers for SDR Console and SDR#, instructions on how to install the autologger script, and a unique ID for your autologger station.
Virtual Serial Cable
For the SDR Console version, a virtual cable is required for the logger to work properly. The virtual cable will allow the autologger program to automatically change frequencies, collect RDS logs and send them to the map. Recommended: com0com - Version 2.2.0
- Extract com0com-3.0.0.0-i386-and-x64-signed.zip to a folder on your drive.
- Open the extracted folder.
- Double click on either Setup_com0com_v3.0.0.0_W7_x64_signed.exe (for 32-bit) or Setup_com0com_v3.0.0.0_W7_x86_signed (for 64-bit) machines.
- Click "Next", then "I Agree".
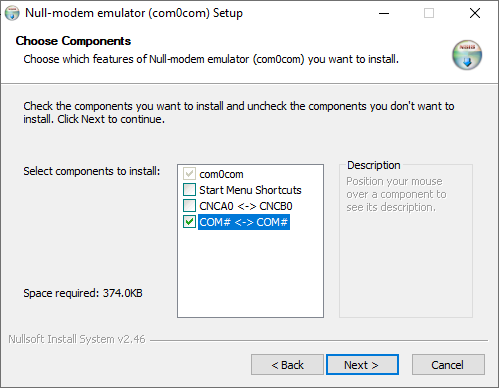
a. In the Choose Components window, check the COM# <-> COM# box, then click "Next".
b. Click "Install" to install the ports.
Examples of installing the virtual serial cable are located here and here.
Once installation is complete, the virtual serial cables are ready to use.
To view the ports you installed in SDR Console:
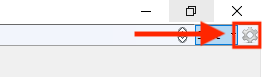
- Click the gear symbol in the top-right corner to access the Program Options.
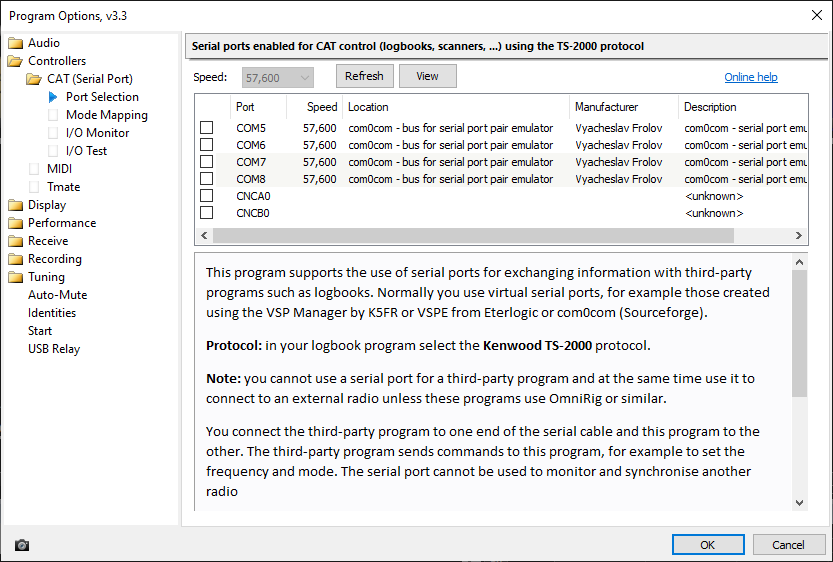
- SDR Console > Program Options > Controllers: You should see the two com0com virtual serial ports displayed and enabled (checked).
I would recommend closing out SDR Console prior to installing the autologger program.
Installing the Autologger
SDR Console
- Open fm_sdrconsole_install.exe via the link provided by Russ.
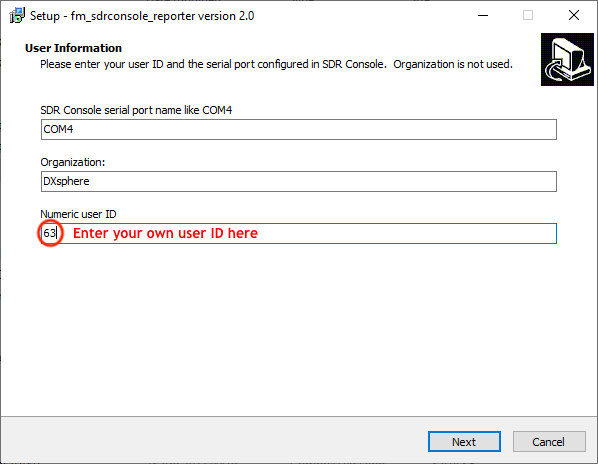
- Enter the following information in the User Information window:
a. Serial Port Name - One of the COM port numbers as listed in SDR Console > Program Options > Controllers.
b. Organization - Your name or organization (recommended), but this is up to you. It will not be displayed on the autologger map.
c. Numeric User ID - This is the unique ID given to you by Russ. - Click "Next". You will be taken to the Select Destination window. Here, you can tell the wizard where to install everything. The default location is C:\FM_SDRCONSOLE.
This will install the autologger to the destination specified above, and create a Scheduled Task which puts everything together.
SDR#
Coming soon!
At this point, everything should be installed. I recommend restarting the machine as the autologger program is designed to run at start-up.
Now you can plug in your SDR and fire up SDR Console! If all went well, you should notice the frequency changing every few seconds.
Configuring the Autologger (for SDR Console)
Once installed and working, it's relatively easy to configure a few settings. Before you begin, you should get familiar with the autologger files you installed above.
Start by opening the destination folder. The default location is C:\FM_SDRCONSOLE.
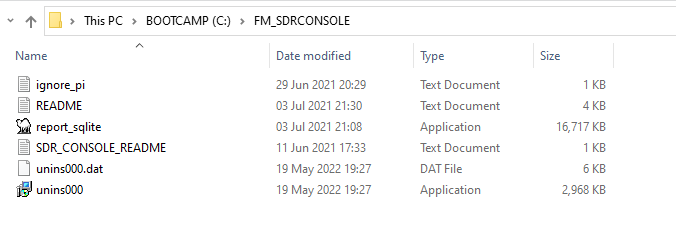
In that folder, you should see the following files:
- ignore_pi.txt: This is the ignore file, designed to allow you to eliminate common false decodes that you encounter.
- README.TXT: Very detailed information about the autologger program and how everything works. I highly recommend reading this.
- report_sqlite.exe: The guts of this program is located here. Double clicking this will start up the autologger if it's not working for some reason.
- SDR_CONSOLE_README.TXT: Information about installing the autologger for SDR Console and setting up virtual cables.
- unins000.dat: Data file. Ignore but don't delete.
- unins000.exe: Uninstall the autologger program from your computer.
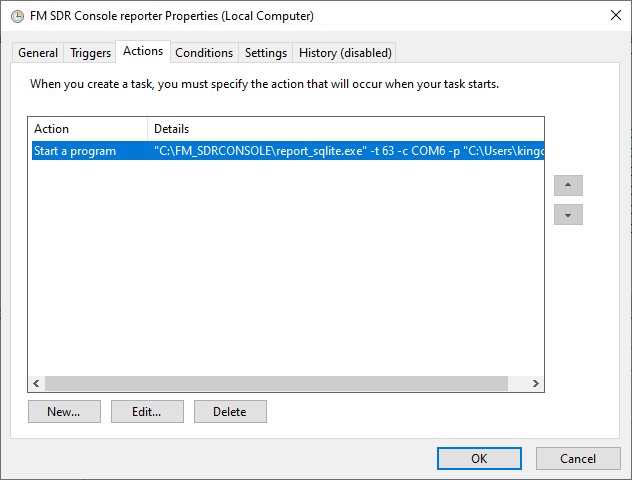
To see the Scheduled Task created when installing the program, open the Task Scheduler program on your computer.
You should see the task associated with the autologger in the list. To open it, double click on it. To change the task, click the "Actions" tab, then change the highlighted action.
Another window displays, which contains fields for the Program/Script and the arguments.
The Program/Script field value should be the file location of the report_sqlite.exe script (Default: "C:\FM_SDRCONSOLE\report_sqlite.exe"). This should not be changed unless you move the folder with the autologger files.
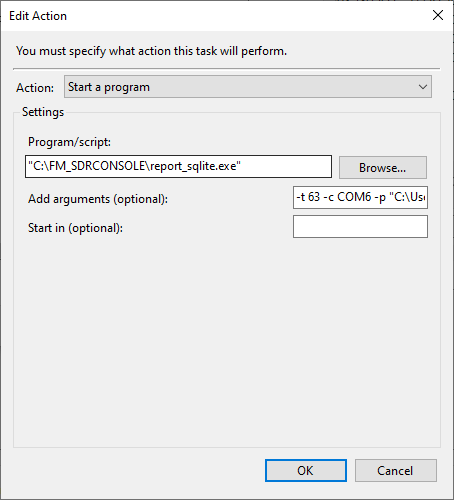
The arguments field should contain a string similar to this:
-t 63 -c COM6 -p "C:\Users\kingc\AppData\Roaming\SDR-RADIO.com (V3)" -s 7
- -t = Unique user ID
- -c = Computer port. This can be modified if needed to match the port numbers in SDR Console. Only one COM port should be entered in this argument.
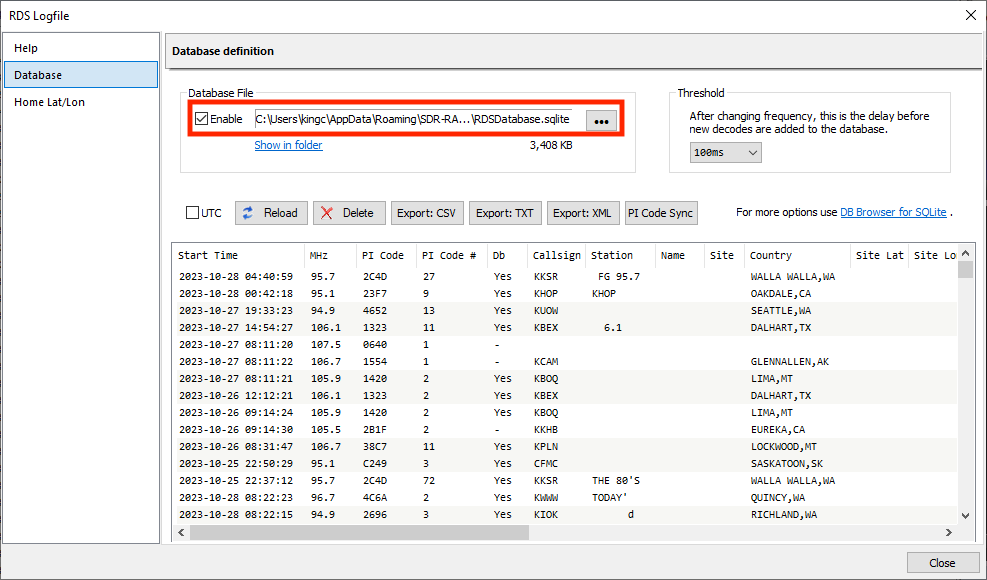
- -p = Location of the SDR Console RDS SQL database. This can be accessed in SDR Console > Receive > Broadcast FM > Database, click the three dots at the bottom of the window that pops up, then the database tab.
- -s = The number of seconds between each frequency change. I recommend this be set somewhere between 5 and 10 seconds.
Autotuning: How To Park on a Single Channel
As you learned above/already know, when the autologger is running, SDR Console will autotune from one channel to the next every few seconds. This is great when you want it to tune through the entire band for propagation, but sometimes you want to be able to tune manually. You could stop the autologger by ending the task in Scheduler.
But did you know that you could manually surf the FM band or even park the tuner on a single frequency - WHILE keeping the autologger running? So basically, you could manually tune and STILL log anything that comes through.
Well...you can! Experienced autologger users already know that you could change the tuning interval to some ridiciously high number (like 50,000 seconds, which is almost 14 hours), but this merely slows down the tuning.
But there's a much easier method: Disconnecting the virtual serial cables in SDR Console. All you have to do is open the serial ports and uncheck both of them. This will sever communication between SDR Console and the serial ports, effectively freezing autotuning and allowing you to manually tune or park your receiver while logging any RDS signals that come in to your map.
The virtual serial ports allow the autologger script to automatically change the channel based on the interval set in Task Scheduler. That's it! It doesn't affect the logging part of the script. The logging part of the program is fed by the SDR Console RDS Database, independent from the autotuning function.
Final Note:
If the autologger stops working, the best solution is to restart your computer.